Overview
Setting up a new fax line in EvoVoice involves two key components:
-
Incoming Fax Number – Used to receive faxes via email.
-
Outgoing Fax Email – Used to send faxes to other fax numbers.
This guide outlines the process of purchasing a fax number and configuring it for both incoming and outgoing faxes.
A. Setting Up an Incoming Fax Number
1. Gather Required Information
-
Client Name
-
Area Code of the fax number the client wants to purchase
-
Client’s Email Address where faxes will be sent
2. Purchase and Configure the Fax Number
-
Log in to EvoVoice.
-
Ensure you are using the correct account.
-
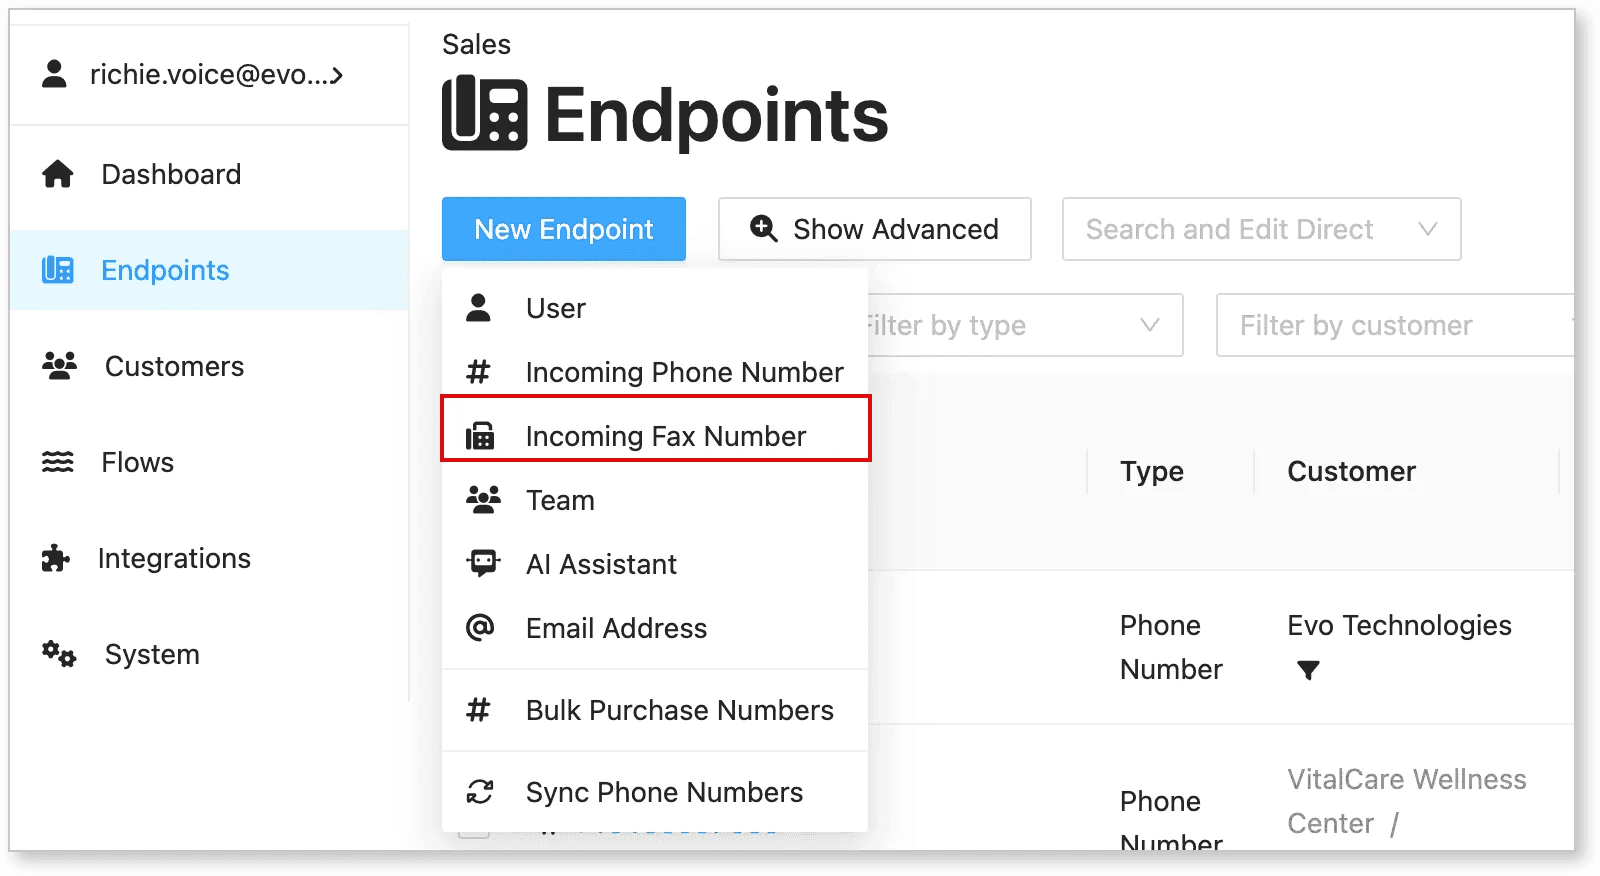
Navigate to Endpoints > New Endpoint > Incoming Fax Number.
-
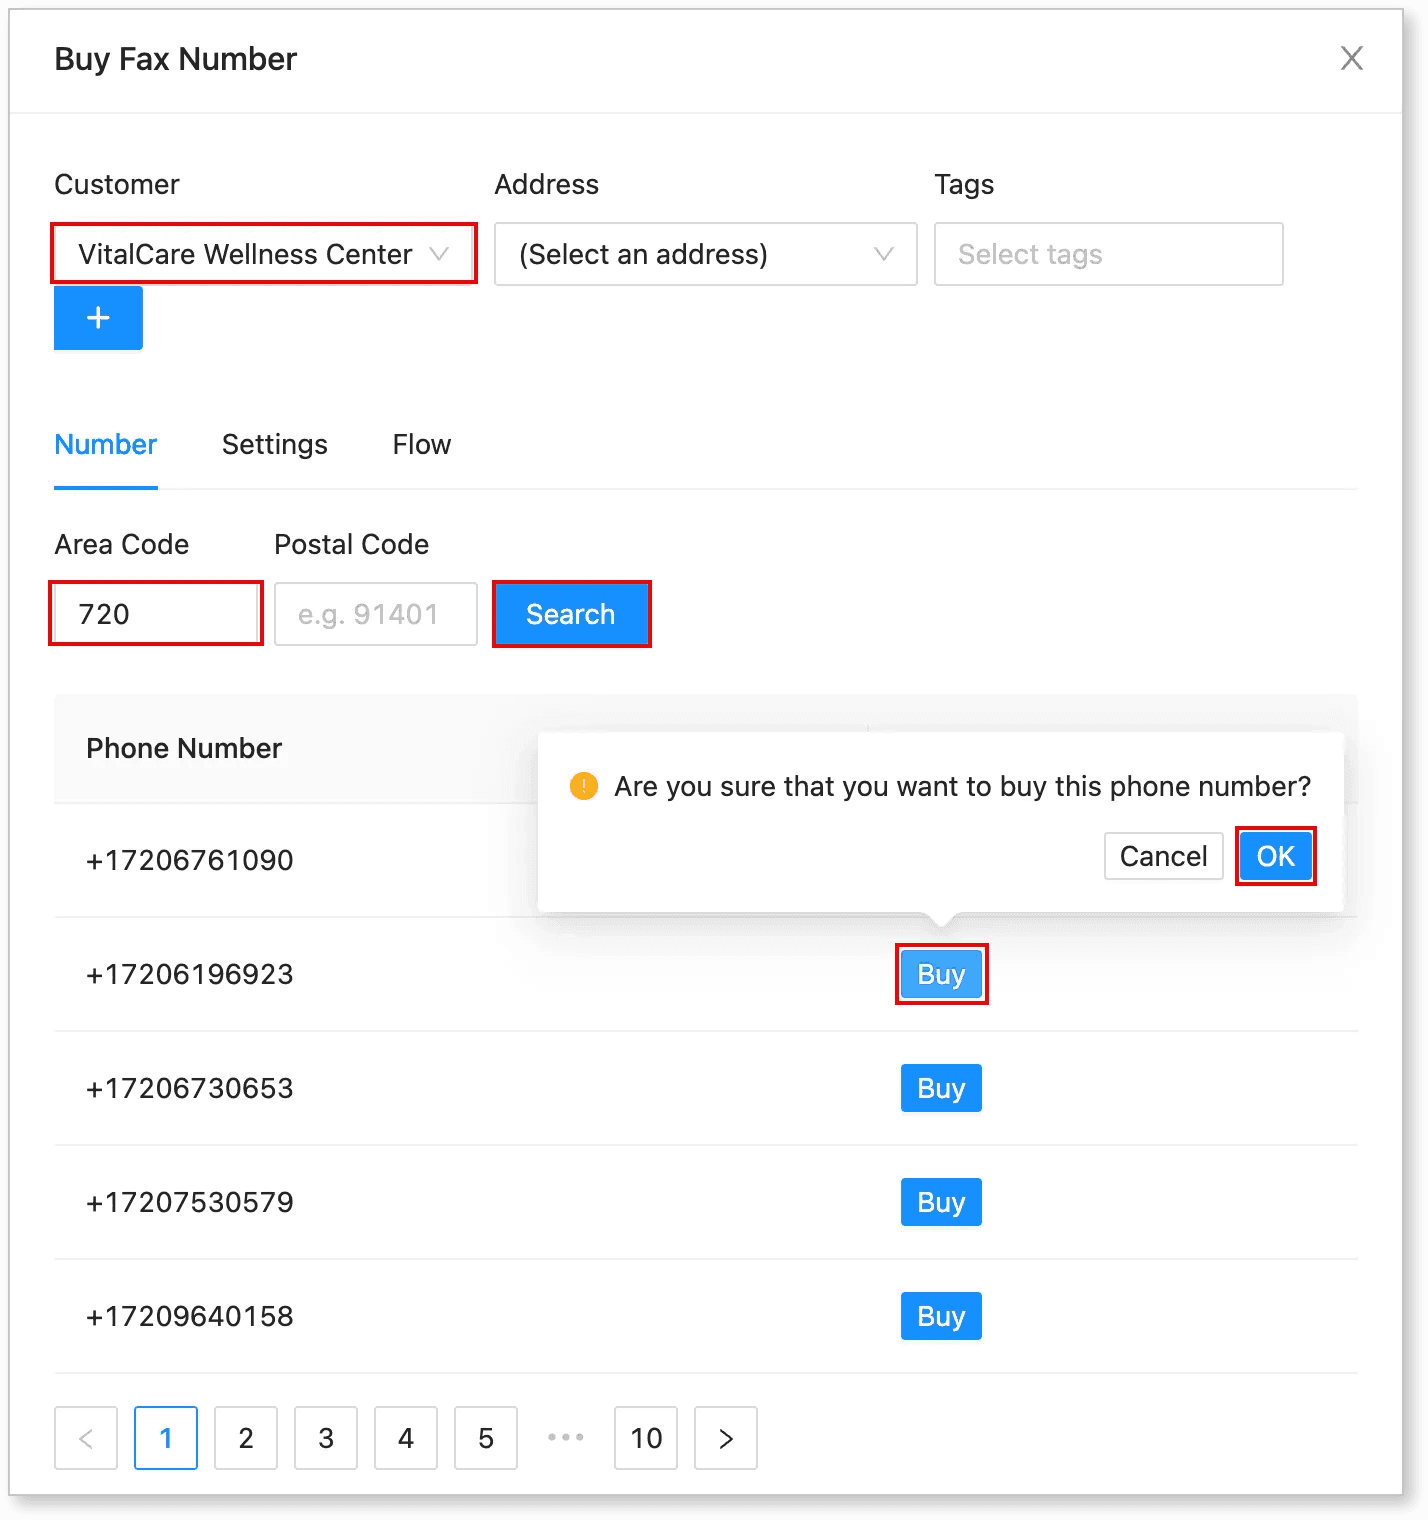
Enter the Client Name.
-
If this is a new client, click + to create a new client. Make sure the Parent Center is set to the correct Center Name.
-
Enter the Area Code and click Search.
-
Choose the fax number you want and click Buy. Confirm by clicking OK.
-
After purchasing, you will be redirected to the Fax Number Configuration page.
-
Check that the Customer Name and Parent Name are correct.
- Example: For VitalCare Wellness Center, it should display VitalCare Wellness Center > Incoming Fax Number.

-
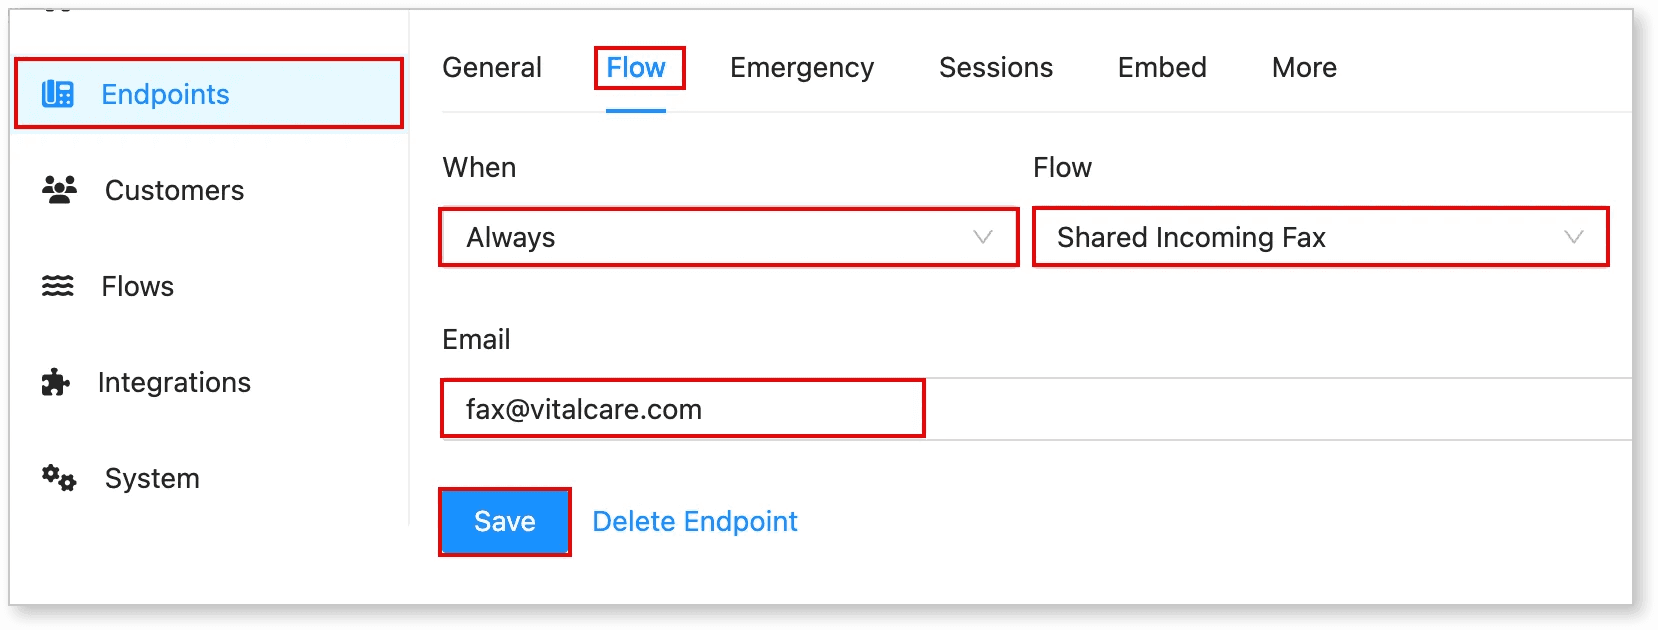
Click on Flow.
-
Set When to Always.
-
Set Flow to Shared Incoming Fax. If this flow hasn’t been created yet, contact our support team.
-
Enter the client’s email address where faxes will be received.
-
Click Save.
B. Setting Up an Outgoing Fax Email
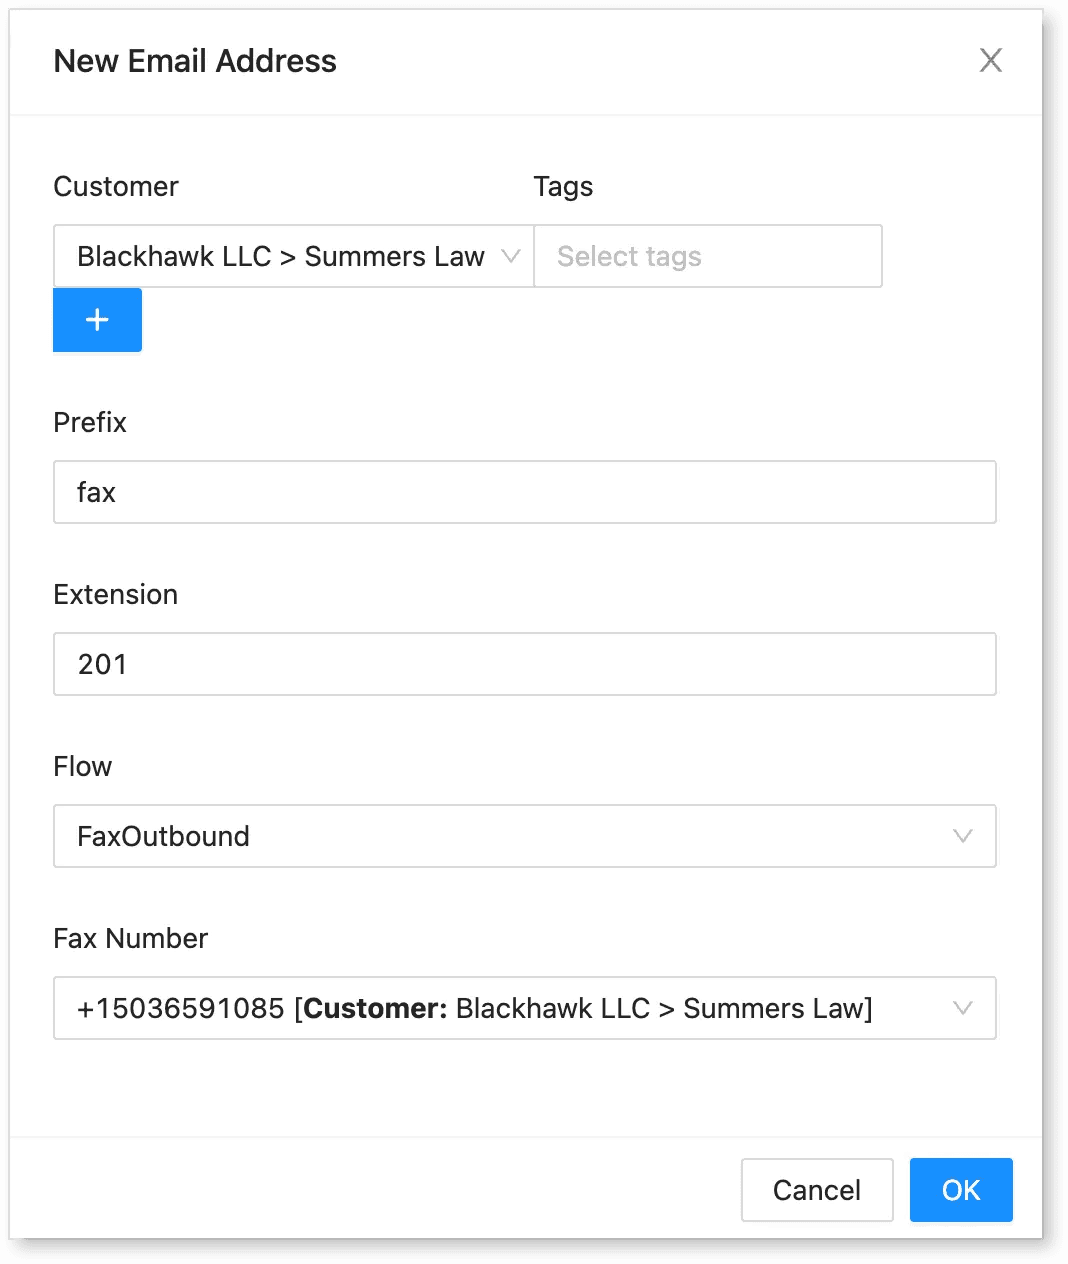
1. Create an Outgoing Fax Email Address
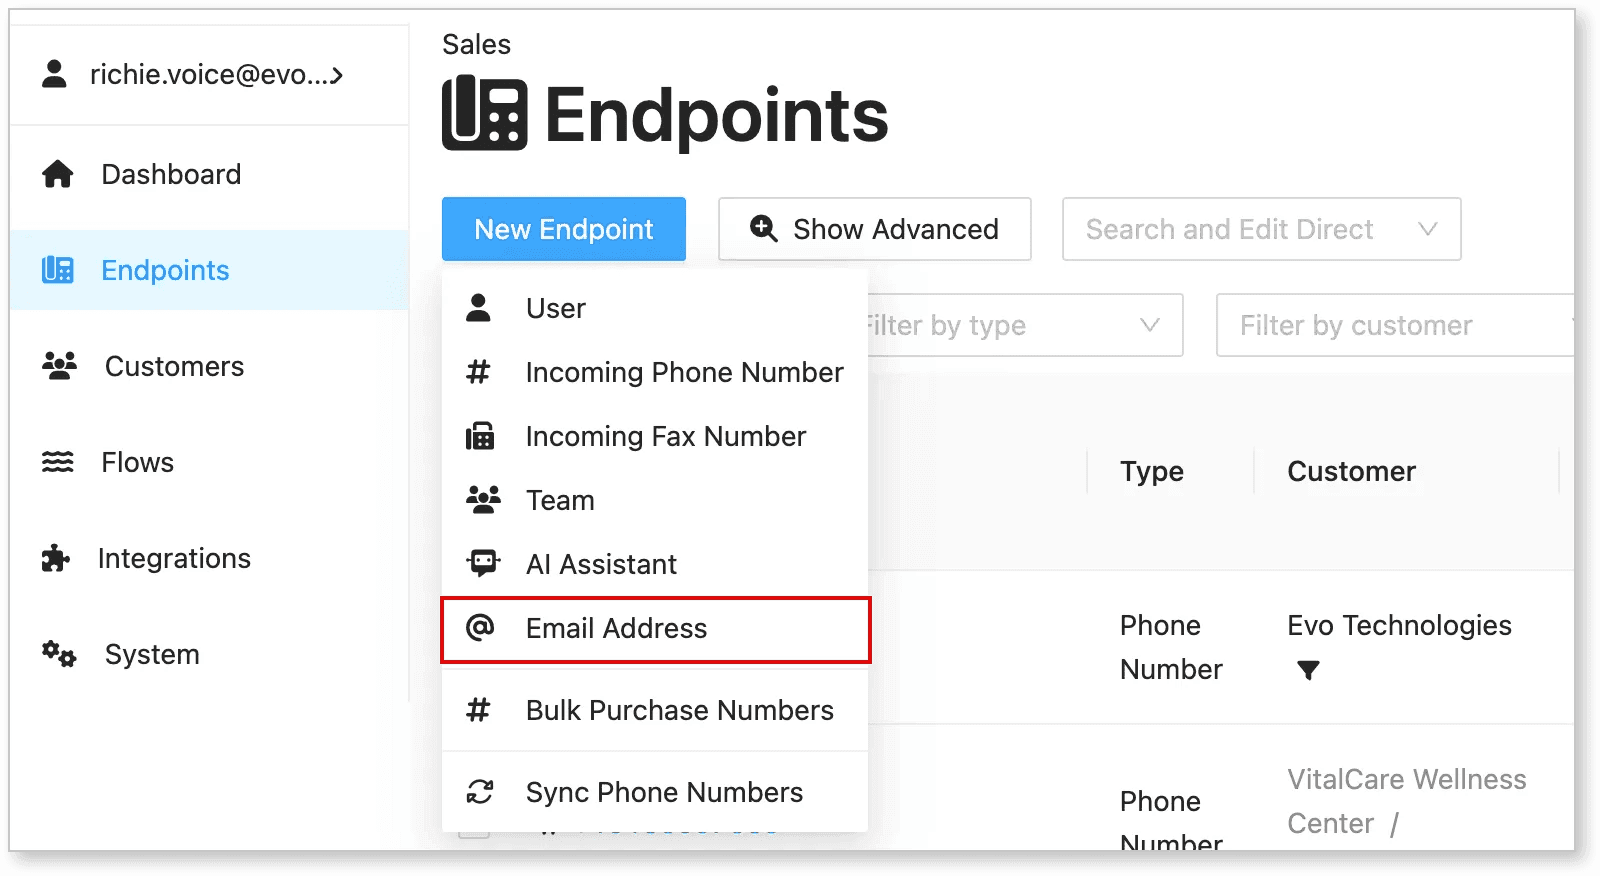
- Navigate to Endpoints > New Endpoint > Email Address.
-
Enter the Client Name.
-
Fill in the following details:
-
Prefix – Enter
fax(no additional text needed). -
Flow – Select SharedOutgoingFax, FaxOutbound or whatever is has been setup to your organization.
-
Extension - Enter the extension number if applicable.
-
Fax Number – Enter the fax number purchased earlier.
-
-
Click OK.
-
The system will generate a fax email address.
-
Note down the assigned Fax Email Address for reference.
C. Finalizing the Setup
-
Record both the Incoming Fax Number (e.g., +17202146424) and the Fax Email Address (e.g., fax@vitalcare.com).
-
Send these details to the client.
-
Include the “How to Fax using EvoVoice” document for reference.
Important:
-
The fax number and email address will be unique for each client.
-
Do not use the example numbers and emails provided.
Conclusion
Following these steps ensures a smooth setup for fax lines in EvoVoice. If any issues arise, confirm that the client details and settings are correctly configured.